
Want to Become A Concert Photographer? Here Are Some Tips and Recommendations!
We at Glasse Factory know that it can be hard to get your foot in the door as a concert photographer. We have some tips and tools that we would like to share, and some recommendations on what gear you should stock up on!
First things first, the gear…
Whether you have a camera already sitting on the shelf or need to stock up on something new, it’s going to take a little saving up to start things off. Do some research yourself and see what camera works best for you. However, the main complications that come with most starter gear and package deals are the lack of tools they have in low lit environments. You’re going to need to crank up that ISO in a bind, and most starting crop sensor cameras won’t do the trick, even under a really experienced photographer’s hands. Here are some gear suggestions we have, with lenses, cameras, that we have personally put to the test and stand by!
Another investment you’ll need to be ready to provide is a subscription to an editing software. We are heavy advocates for the classic Adobe software. They even have a “Photography” package, including both Photoshop and Lightroom, for just under ten dollars a month during the first year of subscription.
Build that portfolio…
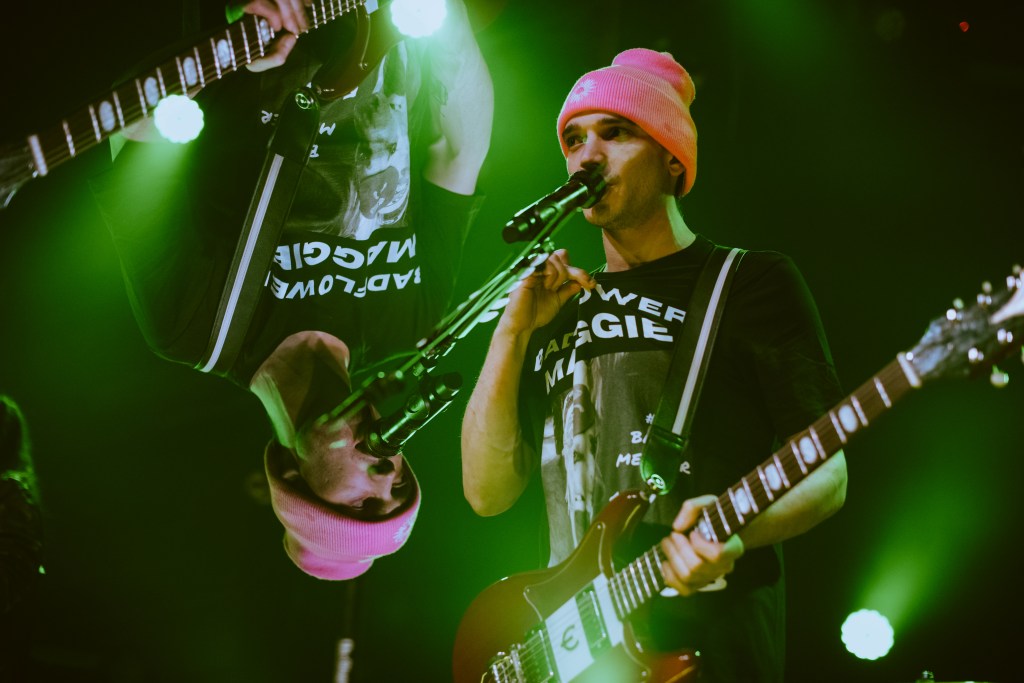
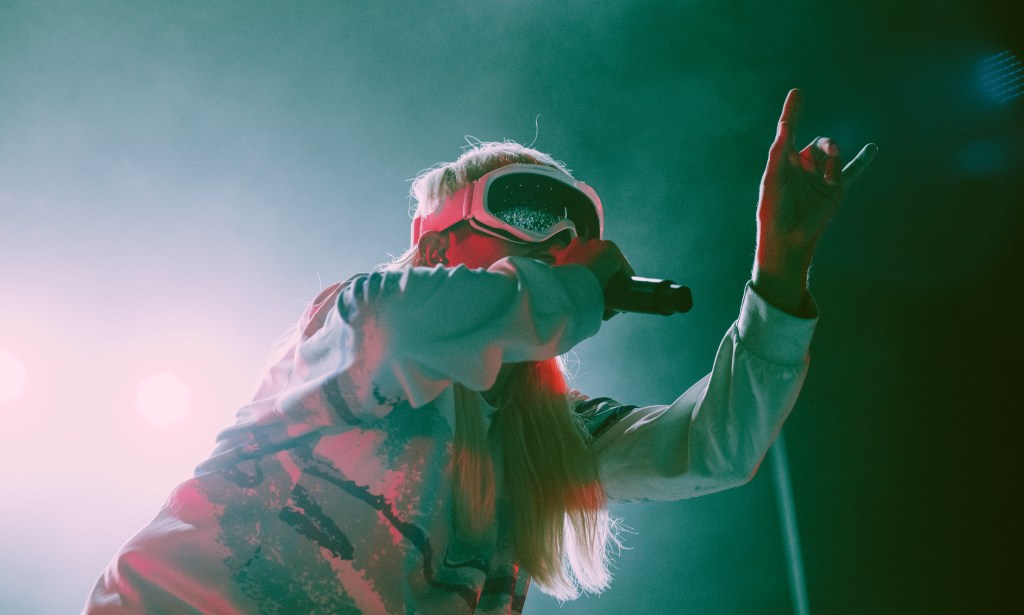
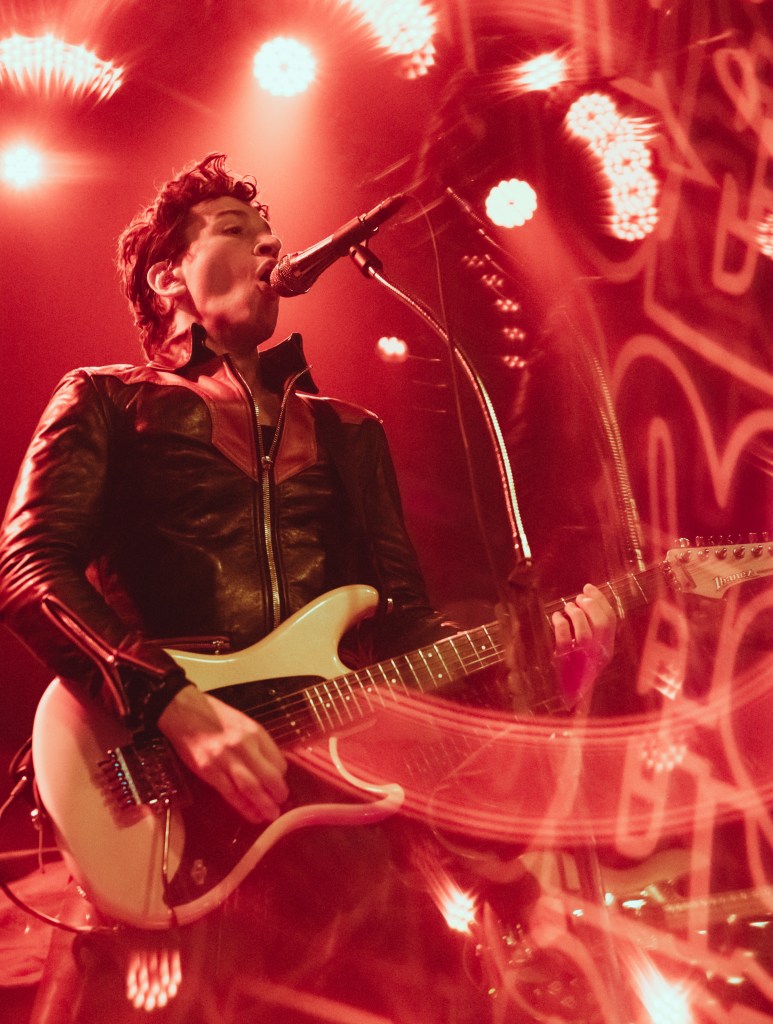
If you know a friend that’s in a band, don’t be shy and ask them if it’s okay to take photos of their set! Go to local bars and venues, and ask if it’s okay to use your camera. Make sure that it’s okay with the parties involved before you bring your camera to the event.
Some basic tips as you grow that portfolio:
Practice, practice practice. Bring your camera everywhere. We go back to the point in building a portfolio. We highly suggest that in using your camera, that you transition from auto mode to manual. In a low-lit environment, it’s an essential step to make because most camera technologies can make a good guess at what lighting environment you’re in, but it’s best when you’re at full control, especially as concert lighting is always having to shift and change. Here are some tips on how to make that transition.
ISO, aperture, and shutter speed basics…
In summary, ISO, aperture, and shutter speed are the three main settings that control the exposure of your photos. By adjusting these settings, you can control the brightness of your photos, the depth of field, and the amount of motion blur. Mastering these settings can help you take better photos in a variety of lighting situations.
ISO measures the sensitivity of your camera’s image sensor to light. The higher the ISO, the more sensitive your camera will be to light, and the brighter your photos will be. However, a high ISO can also introduce more digital noise or graininess to your photos.
Aperture refers to the opening in the lens that lets light into the camera. It’s measured in f-stops, and the lower the f-stop number, the larger the aperture opening. A larger aperture (lower f-stop number) will let in more light and create a shallower depth of field, which can help to blur the background in your photos.
Shutter speed refers to the length of time that your camera’s shutter is open, and it’s measured in seconds or fractions of a second. The longer the shutter speed, the more light will be let into the camera, but it can also introduce motion blur if the camera or the subject is moving. A faster shutter speed can freeze motion, but it will also let in less light.
Another note to keep in mind is whether or not you’ll take photos in RAW versus JPEG:
In summary, shooting in RAW gives you more control over the final image in post-processing, but the files are larger and require more processing time. Shooting in JPEG is quicker and easier, but you have less control over the final image. The choice between RAW and JPEG ultimately depends on your workflow and the level of control you want over your images. If you want the most flexibility and control over your images, shooting in RAW is usually the way to go.
When you shoot in RAW, your camera captures all of the data from the image sensor, including the color and brightness information. This means that RAW files are much larger than JPEG files, but they also contain much more information that can be used in post-processing. RAW files are not processed by the camera’s internal software, which means that you have more control over the final image in post-processing. This is because you can adjust settings like exposure, white balance, and contrast without losing image quality.
When you shoot in JPEG, your camera applies some processing to the image data before it saves the file. This includes settings like exposure, white balance, contrast, and color saturation. The resulting JPEG file is smaller than a RAW file, but it also contains less information. JPEG files are good for quick and easy sharing or printing, but they don’t offer the same level of flexibility in post-processing as RAW files.
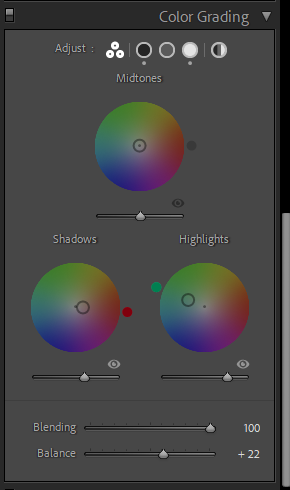
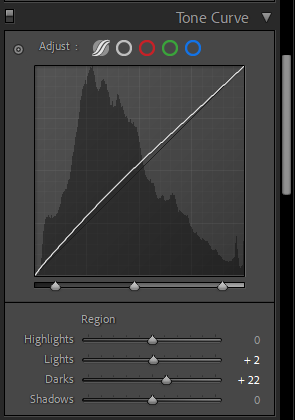
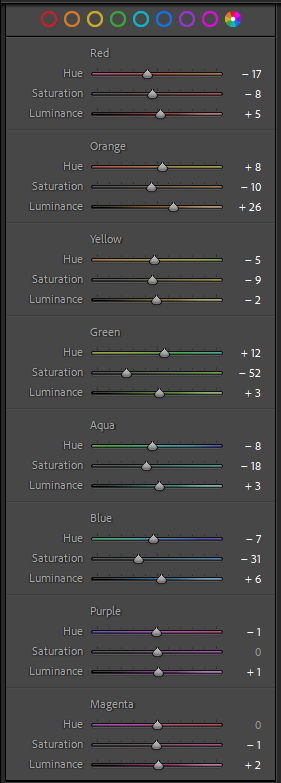
We have attached an example of a concert photo and the settings we used to capture the image– you will also see a comparison of the raw image and how we edited it based on stylistic and color-correcting changes:
Attached, we have the settings we used in color-correcting, lighting adjustments, and even some color grading details if you’re feeling a little adventurous.

Would you like to see more details in how I edit my photos? Join me on our Twitch as I edit concert photos, offer tips to rising photographers in and out of the industry, and much more to come!


![Charli xcx - SS26 [Credit - Henry Redcliffe]](https://i0.wp.com/glassefactory.com/wp-content/uploads/2026/05/Charli-xcx-SS26-Credit-Henry-Redcliffe.jpg?fit=680%2C510&ssl=1)
1 Comment